Chocolate Molds

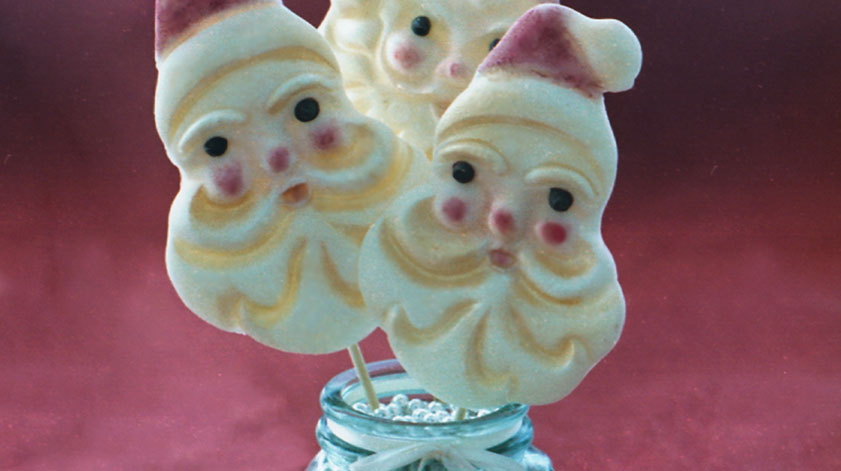
 These chocolates are just as delicious as they are easy to make. You only have to make sure that you have your chocolate not too hot, just enough to melt smooth. The cutters are not heatproof, as many of you know from losing them in the dishwasher. So I would melt your chocolate in the microwave according to the directions on the package.
WHAT YOU WILL NEED –
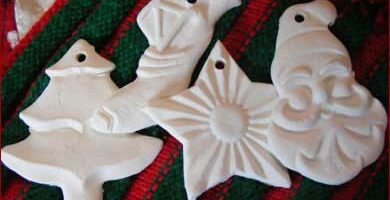
- Chocolate Molds or Cookie Cutters (found in our store)
- White chocolate wafers
- Preferred Colors of Edible Glitter Dust or Luster Dust
- Chocolate morsels for eyes (mini or cut in halves),
raisins or any other decorations you would like to add. - Paint Brush (found in our store)
- Lollipop sticks (If doing larger shapes) (found in our store)
- Cellophane Bags (if giving as gifts)
1. Temper or melt chocolate according to directions on the package (do not overheat chocolate). Chocolate should be smooth and spreadable.
2. Layout cutters so they are flat, balance with a wet paper towel or dishrag. Spoon tempered chocolate into cutters and smooth until flat. If you want to add a lollipop stick to the bottom of the chocolate do this now. Let stand till cool and hardened (can be put in the refrigerator).
3. When cool and hardened pop chocolate out of the cutter. Any imperfections in the shape can be smoothed over with tempered chocolate (if needed).
4. After chocolates are done it is time to decorate. Choose your colors and paint on Dusting Powders a little at a time (until comfortable with using it). Add other decorations to chocolate molds with mini morsels for eyes or red candies for Christmas ornaments on trees. Whatever you like!
5. You should end up with chocolates that will WOW! your friends. Set them out as is or wrap them in cellophane bags and give them away in your gift baskets.
